Planting with Kitchen Scraps
In this uncertain time, I am taking a lot of solace in my small, although comforting, indoor garden. I live in an apartment without a balcony, so all my many plants are inside with me. But my true gardening love is to tend to vegetables and fruits and herbs, which I did often as a kid growing up. So now, with the insecurity surrounding going to the grocery store, I wanted to explore some easy ways to re-grow scraps from our kitchen in materials we have available!
These were really relaxing to do, you feel like you’re wasting less, and it’s a great introduction into a lot of scientific topics to explore with you kids, from photosynthesis and how plants grow to plant anatomy, or even the water cycle. You can always do the classic bean in a damp paper towel in a cup or bag near a windowsill experiment, which is a good way to visualize what’s happening, but I took a little different approach and went from some items that were sprouting on my counter top and put them in some dirt.
The items that I used for this project are (underlined are what I personally used):
• Any food scrap pieces you have. You can use carrot tops (though they won’t regrow carrots, they will grow pretty green stems you can used to flavor your sauces), green onions, garlic bulbs, ginger or turmeric roots, any cutting of herb will work, a slice of tomato or half a bell pepper. Here is a great list of food that works.
• Potting soil.
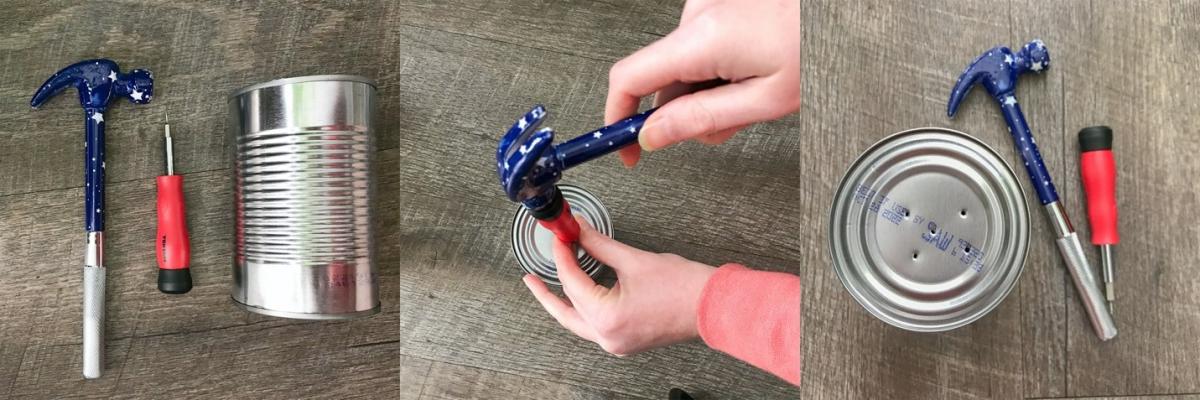
• Either a pot, or an empty tin can- with a hammer and screwdriver to modify the can.
• And, importantly, a bright sunny window and water.
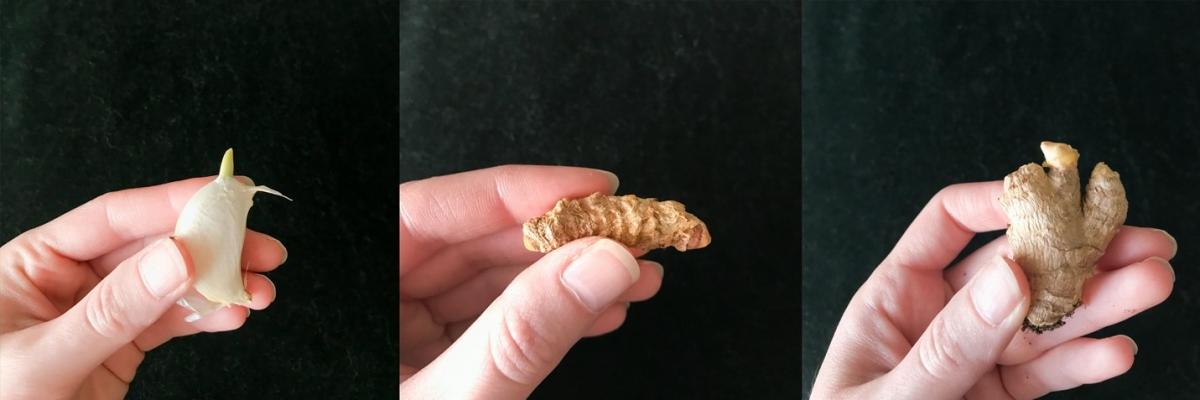
So, to get started, I chose what items would work for me from my counter. I absolutely love ginger, turmeric and garlic, often I put all three into my meals! After research I saw that while they may take a while to reproduce enough for me to use in cooking, the greens that sprouted from them were really nice to look at too. So I took a garlic clove that was already sprouting, two inches of ginger that were beginning to sprout as well, turmeric roots I had left, and my green onions (which always come with roots on, so you can put them in water to stay fresher for longer).
Next, I needed somewhere to put the pieces I decided to plant, like I said… I have many indoor plants, and don’t have empty pots lying around for long, so I thought I could make do with some empty cans. All plants need water, but few plants like to be sitting in wet dirt for very long, so it’s important that your planters have drainage holes in the bottom. It was simple to do this with household tools, but make sure grown-ups are either doing this part, or supervising. I just placed the can upside down, took a thin screwdriver and tapped the head of it into the can with a hammer (yes my hammer has stars on it, and it works just as well, if not better, than a normal one). I think this can be easily done by your little ones with clear direction and supervision. It’s important to introduce skills like this in a fun (and pretty easy) way.
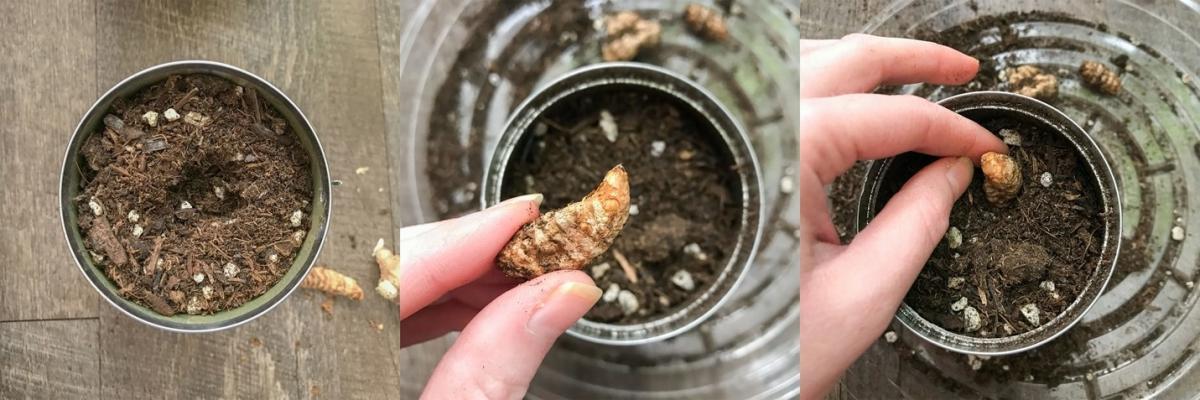
Then the planting begins! You fill your tins with dirt, create a little hole in the dirt, then place in whatever you’re planting! If you’re planting something that already is sprouting or has a little green on it, leave a little bit of that out so the leaves can soak in the sunlight and grow faster (this is a perfect place to talk about photosynthesis for your older kids). You pack the dirt around whatever scrap you’re planting (pictured is the turmeric root). Water well and place by a window and you’re done!

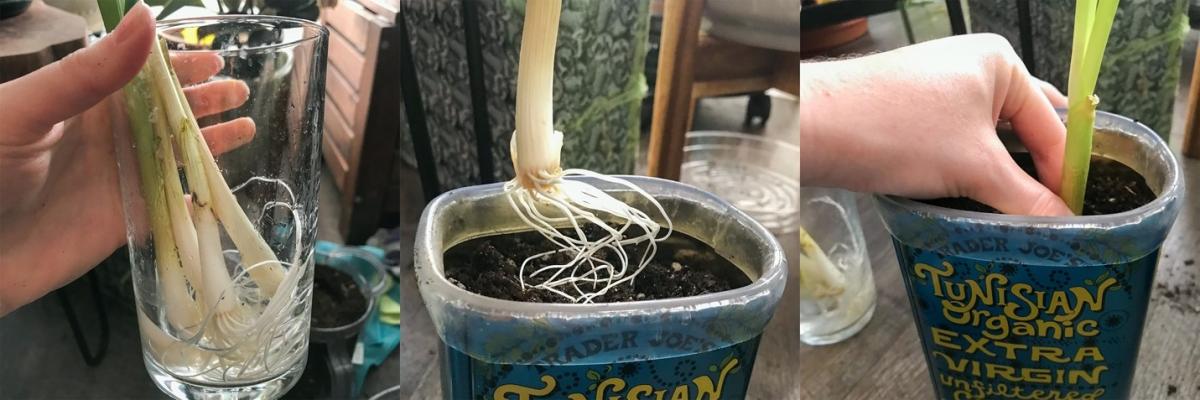
You can plant in almost anything if you’re thoughtful about it! I used an old olive oil can to plant my green onions in, I’ve drilled holes into a pair of boots that was too small and planted succulents in there. Colanders, bowls, teapots, cups… the list goes on! In this time of limited supplies and being in the house, getting your hands a little dirty and seeing something you accomplished at the end is a sure to grow your positivity.

Show us what you’ve potted! Tag us on Instagram or Facebook, we look forward to growing with you! And… let us know if you would like to see more upcycled projects like the ones below! Fun for kiddos… and us grown kiddos too!
Visit our Kidspace-At-Home: Virtual Learning & Play Resources page for additional blogs, projects, and more!