Make Salt Dough Figures Together as a Family

Many families look forward to the holiday season and the many family traditions that make this time of year—and each family—unique and special. In today’s post, Kidspace team member, Heather Grimaldi, shares some of her family’s traditions and her easy family technique for making Salt Dough Figures for the holidays.
My Holiday Family Tradition
We have many family traditions that we celebrate and participate in throughout the year. However, this is the season that is most important to my family. There seems to be a more magical feeling around our winter family traditions. Some of these traditions are things I brought with me from my childhood, and some we started when my kids were born. In a recent conversation with my kids, I also discovered that some of the things THEY consider traditions, I never meant to be!
 I was going over my menu for our holiday morning, talking out loud but not really to anyone in particular, when my son chimed in, “Wait, aren’t you going to make the Monkey Bread and Peanut Butter Rudolphs?” I responded, “I made those as a way to get you and your sister to eat something other than candy first thing in the morning. Now that you both sleep longer, I hadn’t planned on them.” “But you HAVE to make them! They’re a TRADITION!” he insistently pleaded.
On the menu they go! Looking back on this conversation, I really loved the insight into what my kids think of as our family traditions. Traditions are comforting. They bring a sense of security, warmth, and time together as a family. They can connect us to the generations that came before us and the generations yet to come. They can be simple or elaborate and they hold a special place within us.
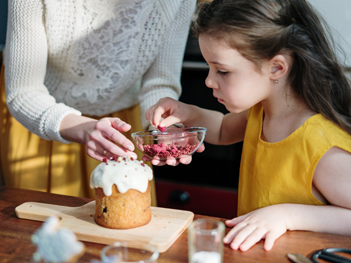
One of the traditions we have is to make salt dough figures together. When my kids were younger, they loved mixing the dough and then forming it into shapes that they could paint and decorate. As they got older, their shapes and figures became more elaborate and imaginative. As a mom, I love that it gives us several hours of together time around the table!
Salt dough is a very simple recipe that has many applications. It has been around for centuries. In the former Soviet Union, people would make salt dough figures of wheat, birds, and fruit as part of the spring rites in hopes of a good harvest. In countries like Ukraine, people would make nature figures like apples, mushrooms, leaves, trees, and figurines of people to give as gifts at the winter holidays, weddings, and birthdays. These figures are presented to give health, happiness, wealth, and good luck to the person receiving them.
If you would like to add a new tradition with your family (or just want something to keep the kids occupied for a while, so you can finish some things around the house in peace) below is the salt dough recipe I use with my family. May it bring hours of joy to your family, too!
Making Salt Dough Figures
Supplies
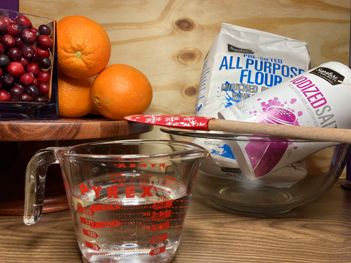
- 2 cups all-purpose flour
- 2 cups iodized salt
- 1 ¼ cups warm water
Directions
- Salt dough figures are fun to make but they are not edible.
- Preheat the oven to 250°F. Mix the flour and salt together, then add the water to the mix. Knead the dough until it is all mixed together. The dough will look and feel almost like playdough when it’s all combined. If the dough is a little too sticky, add a little more flour until it’s the right consistency.

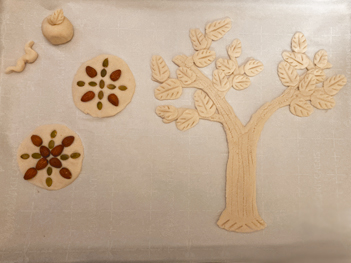
- You can shape the salt dough just like clay and playdough. Roll it out thin and use cookie cutters or make your own shapes and figures. No special tools are needed! I like to keep toothpicks handy for making lines and small features like eyes and mouths. If you want to hang your creations, make sure to put the hole in them before you bake them! I have found a drinking straw is a great way to make a hole in the dough.
- One thing to keep in mind is that salt dough can be fragile once it is hardened. The thinner the shape, the easier it is to harden and dry. Larger, heavier shapes can crack while hardening and break more easily after.
 Place your salt dough creations on a parchment-paper-lined baking sheet and bake for about 2 hours. To test if they are done, feel them. If it feels a little sticky or has some give, then they need to bake a little longer. When they are done, remove from the oven and let them cool and continue to dry overnight.
- Once they are completely cool, you can decorate and paint them. The salt dough needs to be sealed once you are done decorating. Modge-Podge or a spray shellac both work well for this.