Exploring Space
As the evenings get longer, we find ourselves looking to the night sky and wondering at the universe. There is something about outer space that ignites a sense of excitement, imagination, and discovery — space captivates us, and inspires us to explore the unknown! But exactly how do we explore space? Below, we’ve highlighted three ways space is explored, that also practice necessary skills for any future space explorer — imagination, creativity, and science.
Watch the Mars Perseverance rover land on February 18, 2021. Live feed starts at 11:15am PT here. Download NASA’s Interactive Landing Packet Interactive Virtual Landing Packet.
Totally Tubular Telescopes
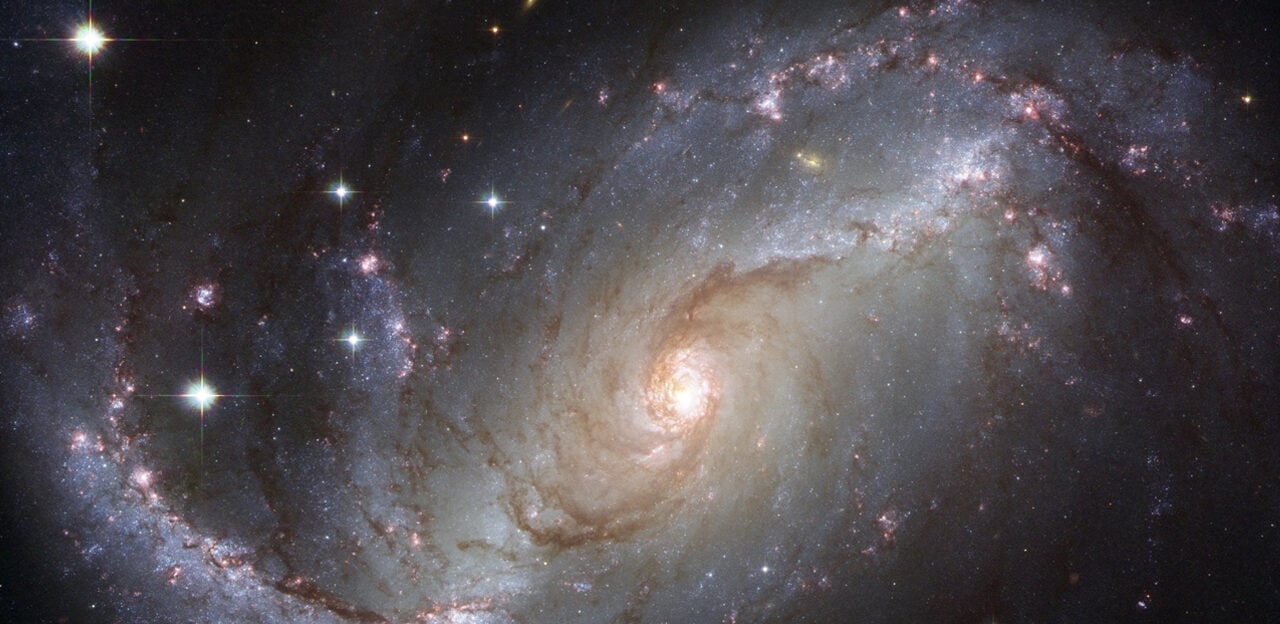
In this activity we’ll create models of telescopes, one of the very first ways we observed space (and still use today). Telescopes have helped us learn that when we look at the sky, we are seeing much more than stars! Nebulas, galaxies, asteroids, and even other planets beyond our solar system (called exoplanets). The picture above is of our nearest neighboring galaxy, Andromeda, and was taken with the Spitzer telescope.
Telescopes are a tool that use curved lenses and mirrors to magnify images. Some are small, like the ones we use in our backyards, and others are big, like those we see at observatories; and some are even huge, like the ones we’ve sent into space, like Hubble and Kepler.
Activities like this introduce kids to the idea that scientists use tools to observe and explore, and encourage skills like careful observation. In this activity, we have used constellations as reference points, to show other cool things that can be spotted when looking through a telescope.
We have two versions of this activity to choose from:
 Space Viewer Version 1
- Paper towel tube
- Foil
- Rubber band
- Scissors
- Push pin (or another pointy object to poke holes in the foil with)
- Download and print page three of our Space Viewer
- Towel or craft mat for poking
- Optional: Supplies to decorate the viewer, for example:
- Paint
- Stickers
- Tape
- Glue
- Markers
- Construction paper
Space Viewer Version 1 Directions
- Decorate paper towel tube, this will be the ‘tube’ of your telescope. Do this first, so if you use paint or glue, it has time to dry while you do the rest of the project!
- Cut out six squares of foil, about 4×4 inches each.
- Download our stars and galaxies template (or, copy over using a pen or marker)
- Place the templates over each square of foil, and using your push pin, push through the paper and tin foil to create the pattern of your galaxy or constellation
- Centering the hole punched area over the opening of the tube, push the foil down around the sides of the tube and rubber band it in place.
- Look through the open end of your tube into a lighted area to see your constellation or galaxy! (as a fun alternative, you can also shine a flashlight into the tube to project the constellation onto a wall or ceiling)
 Space Viewer Version 2
- Paper towel tube
- Download and print this template single-sided Space Viewer
- Cardstock or lightweight cardboard
- Push pin or other pointy object to poke through paper and lightweight cardboard (nail, skewer, toothpick)
- Glue stick
- Craft Glue or Hot Glue
- Brad
- Towel or craft mat for poking
- Optional: Supplies to decorate the viewer, for example:
- Construction paper
- Paint
- Stickers
- Tape
- Markers
Space Viewer Version 2 Directions
- Decorate paper towel tube, this will be the ‘tube’ of your telescope. Do this first, so if you use paint or glue, it has time to dry while you do the rest of the project!
- Download and print the template on paper
- Trace the bottom disc onto cardstock or lightweight cardboard and cut out.
- Cut out the constellation plate (you are welcome to decorate if you like!)
- Glue the two together, centering them. We suggest using use a pencil or your ‘poker’ to help guide you!
- Lay down a punch guide on top of the circles (we’ve left it separated so you can choose your order, or add and create your own constellations to include), and use your poking tool to punch the constellations. We recommend doing this on a towel or craft mat, to make the punching easier.
- Trace (or glue then cut out) the view finder onto the cardboard, and cut it out.
- Carefully glue one end of the paper towel tube to the viewer, and let dry. We used hot glue for the sake of time, but school or craft glue would also work!
- Using the brad, attach the viewer to the disc at the center point – we recommend using a pencil to help get the hole larger before pushing the brad through.
- Look through the open end of your tube into a lighted area to see your constellation or galaxy, carefully rotating the disc to change your view!
More Ways to Explore Telescopes
To make this constellation viewer, we used this virtual telescope called Eyes on Exoplanets where you can spot stars and exoplanets. Explore, and use it to inspire your own viewers!
Browse a library of pictures and discoveries from telescopes using AstroPix.
Take control of a telescope online and use it to take pictures for research using DIY Planet search.
For the history buffs out there, learn more about the technological advances of telescopes with Telescopes from the Ground Up.
For the advanced crafters, try your hand at these paper models of famous NASA telescopes here.
 Spacecraft Maker Challenge
As we looked to the skies and observed space, we were also inspired to travel there. In this activity, we’ll be challenging you to design and build a model of a spacecraft.
Maker Challenges are excellent activities for growing and practicing engineering skills, like design, construction, and problem solving. In our challenge below, we are also leaving a lot of room for imaginative play while exploring a complex topic. This empowers kids to think divergently to find creative solutions to complicated problems.
Even though people have increased our ability to travel in space from a few hours to several days and weeks, our reach is still limited. Space is so vast that we need to learn a lot more about how to move through it, and how people can stay and live there for long periods of time. We hope challenges like this inspire future scientists and engineers to keep pursuing space exploration!
Supplies
- Spacecraft design page (optional) Spacecraft Design
- Use any supplies you have available to you to build your shuttle! These might include:
- Empty boxes from things like tissues or cereal
- Toilet or paper towel tubes
- Twist ties
- Paper clips
- Paper and cardstock
- Bottles and jars
- Foil
- Tape
- Glue
- String
- Markers
 Challenge
Using your supplies, channel your inner aerospace engineer to design and build a model space craft. Here are some things to think about when designing your space craft that engineers have to take into consideration when designing a craft that can go out into space:
- Purpose of the craft. What kind of space craft are you designing? Is it for research? Is it traveling? Is it for fun? Where might it be going? Will it hold people and if so, how many? How long will it need to travel?
- Interior. What does your craft need to carry? Consider what you need to bring into space – food, water, air, what about other supplies? Research equipment?
- Weight (payload). Spacecraft will have to carry a lot of supplies – how will your craft support the weight of the equipment, cargo, and crew?
- Stability. How will your craft stay stable in flight, and during landing? Will it need wings to balance? How might they be arranged?
- Temperature. How will the body of your craft (called the fuselage) withstand extreme cold or heat? Will it need a special coating? What about people on board? How might they stay protected from temperature changes?
- Movement. How will your craft move through space? Will it use rockets and engines? If yes, where will the fuel be located?
More Ways to Explore Space Travel
- Where might we travel some day? Check out the Exoplanet Travel Bureau to learn more about planets we dream to travel to someday! Where might you like to travel?
- Need some inspiration for your spacecraft? Learn more about space shuttles here.
 Rover Puppet
Until people can travel for longer distances and times into space, we send rovers to other planets to explore. In this activity, create a planet (or an exoplanet) and stick puppet rover to explore it!
Imagination is an important part of exploration, and this leaves lots of room for kids to create and picture what other planets might be like, as well as engage in dramatic play and puppetry. It also allows kids to practice decision making skills, as they pick out what colors to use and what features to include on their planet, and which rover to use.
Rovers are robotic vehicles that we can send to space and other planets, like Mars, to explore. There are different kinds of rovers. Some, called orbiters, don’t go to a planet’s surface, but circle around above it (orbiting it) and collect data through things like photographs. Others, called landers, go to a planet’s surface and move around to different locations to collect information about what planets are made of.
Supplies
- Paper Plate
- Food coloring
- Shaving cream
- Toothpick (or any other tool you would like to use)
- Large low-profile dish, plate, or rimmed baking sheet
- Popsicle stick
- Coloring utensils
- Pencil
- Printable Rover Puppet template
- Scissors
- Tape or glue
Directions
- In your dish, squeeze out a layer of shaving cream. Make sure it is at least a little bigger than the paper plate!
- Put drops of food coloring – color and pattern of choice – on the shaving cream, and use your toothpick to move it around to create a pattern. We went with a swirly, gas-planet inspired pattern, but you can try all kinds of designs and ways to move around your food coloring!
- Take your paper plate, and carefully lay it face down onto the shaving cream, then slowly peel it up to reveal your print. If there is shaving cream still stuck to the plate, you can use a butter knife or craft stick to scrape it off. Set aside to dry.
- While the plate dries, print, color and cut the rover of your choice. You may opt to decorate the background of your rover, so it matches your planet!
- Tape or glue the rover to the top of the popsicle stick to make a stick puppet.
- Once your paper plate is dry, use a pencil to draw a single line across your planet, this will be the path of your rover. Hint, only draw to where the crimped edge of the plate begins!
- Use scissors to cut along this line, then use your rover puppet to explore your planet! What is your planet like? What kind of information is your rover trying to discover?
 Ways to Play
- Consider adding texture and dimension to your planet using things like tissue paper, pom poms, and other craft supplies.
- Instead of cutting a path, give your planet theater additional dimension by adding another paper plate (upside down) on top. Use a pencil and scissors to design and cut out landscape elements, and be sure to leave the bottom open for your rover!
More Ways to Explore Rovers
Practice driving the Curiosity rover to explore Mars
Learn more about every Mars rover and what they have learned from NASA here.
Learn more about each part of a rover, and what it does from NASA here.