Brrrrrrr…umation!
Brrrrr… it’s cold outside!
We don’t know about you, but with the cool winter weather, the Kidspace team is starting to feel in the mood for some cozy winter naps! This is especially true for our Animal Ambassadors, who start to take a long winters nap, called brumation, until the weather warms up again.
What is brumation?
Torpor is when a creature’s body slows down for a period of time. All creatures go through a type of torpor. Brumation is a type of torpor that reptiles experience when the temperature gets cold and the days get short. Other kinds of torpor include hibernation, like what many bears do over the winter, and even our nightly sleep!
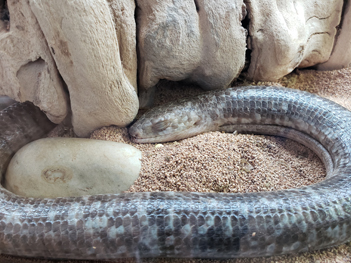
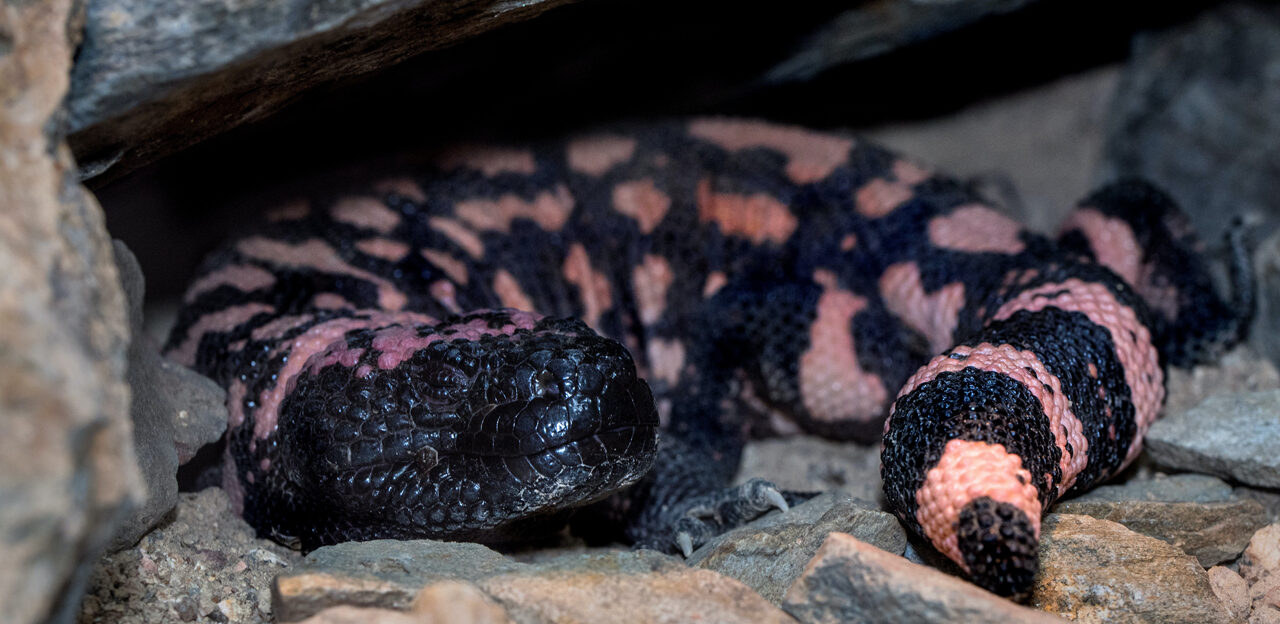
Almost all of our Animal Ambassadors brumate over the winter! Snakes, turtles, and even our Legless Lizard brumate. Our California winters can be mild, so our Ambassadors will still sometimes wake up just enough to bask in the sun and take a sip of water before returning to their den or hide to go back to bed. During brumation, they don’t eat or poop! To take care of them, we make sure they have lots of fresh water, a clean cozy place to snooze, and carefully monitor with food at the ready, in case they want a mid-winter snack. We’ll see them become active and hungry again when the weather warms up, usually around February or March.
How would you brumate?
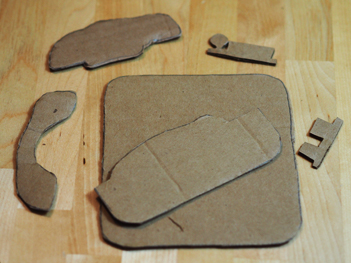
In this activity, we’ll create relief art using recycled cardboard to explore ideas about how we would brumate if we were like our Animal Ambassadors! Projects like this support key areas of early social emotional development, including helping kids recognize their individual and personal qualities – things that they like, need, and want. It also explores identifying similarities and differences between them and another living creature and encourages them to consider alternate perspectives. These are important skills that promote the development of empathy.
Supplies
- Brumation Design Sheet (optional)
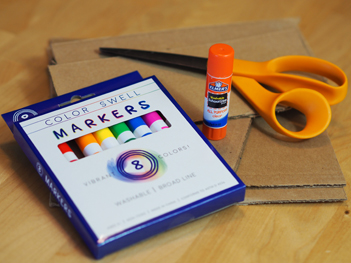
- Cardboard – recycled boxes are excellent for this project. Depending on the kind of cardboard you use, it might be difficult to cut. Consider doing this as a team or using an alternative material. See some suggestions in Ways to Play!
- Pencil
- Scissors
- Markers
- Glue – school glue, a glue stick, or glue guns all work great
Directions
- Imagine what it might be like if you were to brumate! Sketch a simple picture to show your ideas.
What might you need prepare ahead of time? Would you need any special supplies? Where might you brumate? 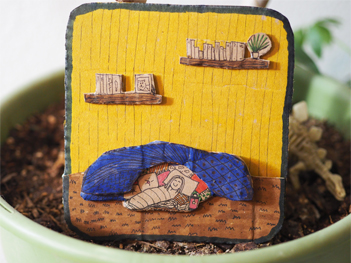 Now, use your sketch to identify at least three main shapes that create the picture. Your background will be the very bottom layer, and the biggest shape; while elements in the foreground will be the be the very top layer, and the smallest shape(s).
We recommend starting with three layers and keeping shapes simple to cut out. You can add as many layers and cut them out with as much complexity as you enjoy!- Create your layers using cardboard by transferring the outlines to cardboard, and cutting them out. There many ways to approach this. Here are two we used:
Carefully re-draw the main shapes on cardboard using a pencil. This way you leave your original drawing intact for reference. Cut up your original sketch to trace. Only do this if you are okay cutting up your original drawing! Start with the largest (background) piece, use it to trace onto cardboard; then cute the middle layer; then the top layer. For either approach, it can be helpful to outline the shapes for different layers in different colors! - Next, color and draw detail onto your layers. You may choose to go an interpretive approach and use only colors, or you might try using use a marker or pen to draw on more details to each piece like we did on ours!
- Finally, stack and glue your layers together to complete your cardboard relief art!
Ways to Play
 Change up the medium! This project is also very effective using construction paper, craft foam, play-dough, clay, or even Legos!
- Consider a more interpretive approach. Skip the design sketch and prepare several differently shaped, pre-cut pieces of cardboard to color, draw, and stack.
- Add additional materials to help bring their vision to life. Lots of items can give children ways to add texture and dimension like uttons, yarn, pipe cleaners, and bottle tops.
- Discuss their creation with them! One way to start the conversation is to point out prominent features you notice about their work (colors, textures, or supplies they chose) and ask them how or why they made those choices.